
SCM Box Installation Manual
Before you start
- Working STB already on site (SBB D3, SBB EON, Telekom Iris, or similar)
- Display currently connected to that STB
- Free LAN / Ethernet port for the SCM Box
- Power outlet for the SCM Box adapter
Important: Set the STB HDMI output to 1080p at 50 Hz or 60 Hz before or during install. Other resolutions may fail to display correctly.
Package contents
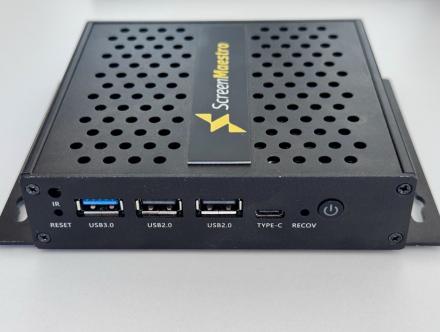
- SCM Box — Screen Maestro Box
- 2× HDMI cable
- HDMI splitter with USB cable for power
- Power adapter for the SCM Box
Connection overview
Signal path: STB → HDMI splitter → SCM Box → display. The splitter is powered from a USB port on the SCM Box. Site LAN and the 12V power adapter connect to the SCM Box.
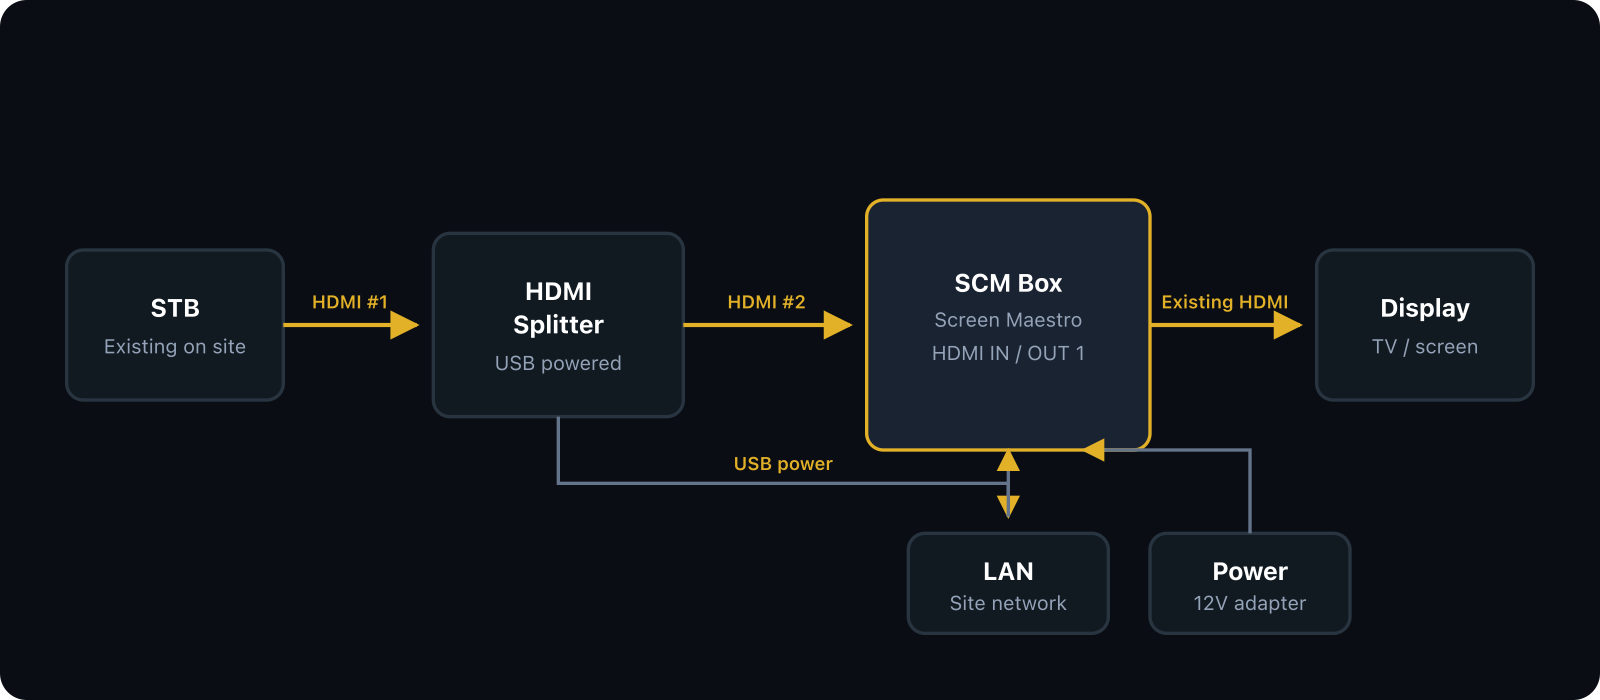 Tap or click the diagram to open full size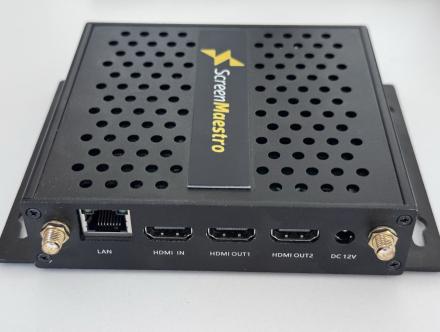
SCM Box ports used
- HDMI IN — from splitter
- HDMI OUT1 — to display
- LAN — site Ethernet
- USB (front) — splitter power
- DC 12V — power adapter
Installation steps
- Keep the existing STB in place — Do not replace the STB. Screen Maestro works with the STB already at the site.
- Disconnect the display HDMI from the STB — Unplug the HDMI cable that currently runs from the STB to the TV / display. Keep that cable — you will reuse it.
- Connect package HDMI #1 to the splitter input — Use one new HDMI cable from the package: connect the STB HDMI output to the input of the HDMI splitter.
- Connect package HDMI #2 from splitter to SCM Box — Use the second new HDMI cable: connect either splitter output to the SCM Box HDMI IN.
- Power the splitter from the SCM Box — Plug the splitter USB power cable into any USB port on the SCM Box.
- Connect the display to SCM Box HDMI OUT1 — Take the HDMI cable you disconnected in step 2 and plug it into HDMI OUT1 on the SCM Box (other end stays on the display).
- Connect LAN — Plug a site Ethernet cable into the SCM Box LAN port.
- Power the SCM Box — Connect the power adapter to a wall outlet, then to the SCM Box. Power on the device.
Verify
Live TV from the STB should appear on the display that was previously connected directly to the STB.
If there is no picture, confirm the STB is outputting 1080p @ 50 or 60 Hz, check every HDMI end is fully seated, and confirm the splitter USB is powered from the SCM Box.
Dashboard access
Device monitoring uses the Screen Maestro dashboard (Dash). If you did not receive device dashboard login credentials, contact [email protected].